13 people found this helpful

You arrive home from a day or a night out, you get ready to unwind, you change into pyjamas and… you start sterilising earrings? While this hardly sounds like your typical Friday night at home, don’t be fooled. Cleaning earrings is actually more important than people realise and something that you should definitely be doing on a regular basis.
But why is learning how to disinfect earrings so important? And how do you properly do it? In this article, we’re going to share some top tips on how to clean earrings at home to help you get rid of any accumulating bacteria and to help keep your bling in sparkling condition.
Let’s dive into how to clean earrings at home easily:
Why cleaning earrings is important
First thing’s first: Why is learning how to clean earrings so important anyway? Honestly, we can’t emphasise enough how necessary cleaning and sterilising earrings is.
Remember when you first got your ears pierced? Then you may also remember receiving some information about cleaning your newly pierced ears and the importance of keeping the skin around the holes clean to stop infection. And whilst the chance of infection from unsterilised earrings to a long-term pierced ear are fairly low, it’s not impossible.
And not only that, dirty earrings can start to smell! It’s natural, so don’t fret, just learn how to clean smelly earrings and prevent it from happening in the first place.
Now do you want to find out the best way to clean earrings? We thought so.
Ear-piercing infections: what to look out for
These are some of the most common symptoms of an ear-piercing infection to look out for:1
- The area around the piercing is swollen and/or painful.
- The area around the piercing is hot, very red, or dark.
- There’s blood or pus coming out of the piercing.
- You’re experiencing chills, feeling feverish, or just generally unwell.
If you’re experiencing any of these symptoms, be sure to reach out to your doctor for help. Here are some steps you can take to help prevent this type of infection from occurring in the first place:1
- Go to a professional, qualified piercer.
- Clean your piercing twice a day.
- Use warm, salty water to help with any crusting.
- Turn your earring in the hole gently while cleaning it.
- Use a clean paper towel to gently dry the piercing after you clean it.
Earrings, especially the parts that go through the ear and clasp in the back, need to be cleaned in order to eliminate, or at least reduce, the potential risks caused by an accumulation of old skin cells and oils, grime, and bacteria. And as for the front of your earrings, if you don’t keep them clean, they’ll lose their sparkle fairly quickly—which is as good a reason as any to clean your jewellery!
How to clean earrings: the front
Now that you know the symptoms of an infected ear piercing, you’re probably curious about how to sterilise earrings. We have you and your earrings covered, starting with the front of your earring.
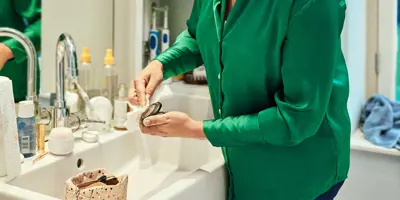
Rubbing alcohol is a great way to help bring the sparkle back to your jewellery. But usually, your earrings won’t even need that much cleaning in the front. Some warm water and washing-up liquid should do the trick nicely. This method can work well on metal, ceramic or plastic earrings, and is great if you want to keep alcohol away from delicate inserts or stones.
What to clean earrings with: water and washing-up liquid
- Squeeze a few drops of washing-up liquid into some warm water. Avoid using really hot water, as this runs the risk of tarnishing your jewellery.
- Mix the solution well and then put your earrings inside the soapy water to soak.
- There’s a good chance that your earrings won’t even need anything more than that. But feel free to give them a gentle scrub with the corner of dampened Plenty kitchen paper if there’s any tough dirt on them.
- Rinse your earrings under cool water and then dry them with a clean sheet of kitchen paper.
- Cleaning pearl earrings is a bit trickier, as pearls are very delicate and easy to scratch. Therefore, you shouldn’t use harsh cleaning products like washing-up liquid and only use very mild cleaners like baby soap. It’s best to only use a soft cloth and warm (not hot) water.
Tip
Use Plenty Flexisheet kitchen paper to wipe down and dry off your earrings. They’ll absorb any left-over moisture whilst still being gentle on delicate surfaces. Plus, with Plenty Flexisheet, you choose what you use, so you can always tear off the perfect amount.
How to clean earrings: the backs
You now know how to clean your earrings to get them back to their shining glory. But cleaning earrings to maintain their lustre is only one small part of it. The most important part is making sure you’re getting rid of the grime that tends to build up in the backs of earrings. After all, if you get an ear infection, this is very likely going to be the cause of it.
To clean the backs of your earrings, you’ll need something strong enough to kill any potential bacteria on the posts and the back. These are the parts of the jewellery that come in direct contact with your piercing, so it’s important that you follow the steps below closely.
Take a look at these steps on how to sterilise earring backs:
- First, be sure to wash your hands so that you don’t transfer any bacteria from them to the earrings.
- Next, pop on a pair of gloves and try rubbing a bit of rubbing alcohol on your earring to check for any adverse reaction. Be sure to just use a little in case this leads to any unexpected tarnishing.
- If your earring takes to the rubbing alcohol well, then go ahead and dip a cotton bud or cotton pad into the solution and gently wipe the backs of your earrings (and any other part that comes into direct contact with your ear).
- You can also submerge your earrings in freshly boiled hot water instead to sterilise them. Be sure that you remove them carefully with a spoon and let them cool before touching them to avoid any burns.
- Lastly, finish cleaning the earrings by rinsing and drying thoroughly.
- Make sure you don’t clean your earrings with hot water and rubbing alcohol if they have any gems or semi-precious stones on them, as these products could damage them.
So, there you have it: how to clean earrings from front to back in just a few simple steps. Now that you see how simple and quick it is to sterilise your earrings, you can wear any pair any time, with peace of mind that your pierced ears won’t pay the price. Stay on top of these tips for cleaning earrings to keep your jewellery shining and your ears healthy!
Sources
Related articles
How to clean silverware until it dazzles
Getting the silverware out for a special occasion? It’s easy to learn how to clean silver cutlery with non-toxic ingredients. Click to find out more.

How to clean aluminium in 5 ways
Find out how to polish aluminium at home, with tips on cleaning aluminium pans, sinks and outdoor surfaces, and more. It’s time to sparkle!

How to descale and deep clean your trusty coffee machine
Read on for a quick and simple way of descaling the coffee machine with vinegar, as well as instructions on how to clean a coffee maker without vinegar.

How to clean stainless steel — without streaks, smudges, or scratches
Learn how to clean stainless steel with these easy-to-follow step-by-step instructions, including what cleaning supplies to use when washing stainless steel.

How to clean the hob that’s under a layer of burnt food
Click to discover how to clean a stainless-steel hob, plus electric and induction hobs – including top tips for cleaning cooker hob plates.

How to remove limescale around the house — gently
Want to know how to get rid of limescale gently? Discover two brilliant yet natural ways to remove limescale from taps, toilets and sinks here.


