1 person found this helpful

If there are two things that kids love doing, it's making noise while leaving a trail of mess in their wake. And what better way to channel these facts of life than by making homemade musical instruments? While scraps of paper and card cascade into the air, turning your living room into a temporary, real-life snow globe, just keep your eyes on the prize: you might be about to discover this generation’s musical prodigy! Digging out scraps of paper from behind the sofa is a small, small price to pay.
In this article, we’re sharing our step-by-step guide to show you and your kids just how musical certain everyday items can be. We say certain because although that vase on the fireplace makes a catchy ringing sound when accidentally bumped into, it's best not to encourage a bongo session on it. That is, unless you fancy banishing all members of your household before army-crawling all over the living room floor, plucking up shards of porcelain!
With these homemade musical instruments, kids can channel their acoustic energy into the right types of materials!
The importance of using what we have
The best part? There are probably things dotted around your house at this very moment that could be used to craft these homemade instruments. You can reduce waste and no need to splash the cash on new materials.
For example, if you have some empty tissue boxes and Plenty kitchen roll tubes lying around, you’ve got the perfect building blocks to make homemade musical instruments that will keep the kids entertained for hours.
Just keep in mind that some sharp objects and hot glue are involved when learning how to make musical instruments with recycled materials. It’s always best if a responsible adult does the cutting and hot glueing. Leave the decorating and creativity to the kids!
So, join us and learn how to repurpose waste, use less, and make a racket in the meantime. The resultant tunes might be questionable, and the living room floor a mosaic of carboard clippings, rubber bands and kitchen roll tubes, but that’s no match for the giant smiles on the little musicians’ faces.
Tip
Painting and decorating are fantastic fun for children, but we must use paint that’s non-toxic. Be sure to check for ‘non-toxic’ labelling on your paint before embarking on your adventure.
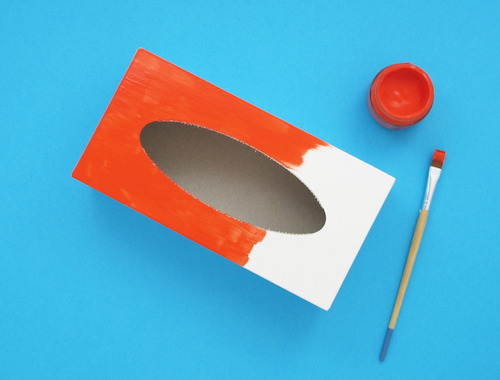
How to make homemade instruments: tissue box guitar
Calling all young rockstars! It's time to rock and roll because we're learning how to make musical instruments from waste material with a tissue box and cardboard tube guitar! You can have loads of fun making your instruments all on your own with some wrapping paper and your favourite colour paint. Let’s get started!
Takes 1.5 hours
What you’ll need to make your homemade instruments:
- Empty tissue box or similar-sized box
- Plenty kitchen roll tube
- Plenty kitchen roll
- Paint
- Paintbrush
- Wrapping paper
- Scissors
- Glue
- Craft knife
- Hot glue gun
- Lollipop sticks
- Large rubber bands
- String
- Sticky tape
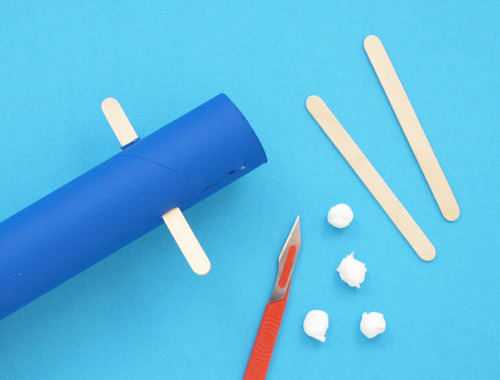
Musical instruments kids can make: a 5-step guide
-
-

-

-
-
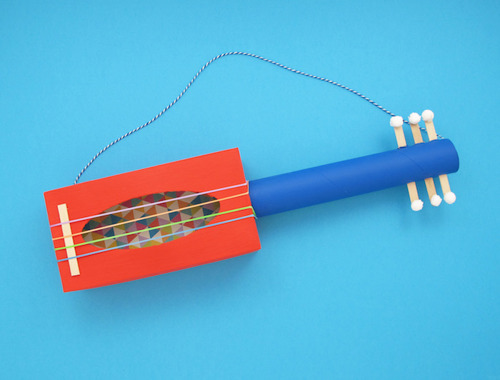
There you have it: how to make a musical instrument in five simple steps. You can actually make lots of different homemade musical instruments with this method. If you use six rubber bands, for example, you have a regular guitar. And if you opt for four, you’ve got yourself a bass! You can almost hear the deep, rhythmic twang, as your friends and family duck for cover from a stray band pinging off into the ether.
While your designated treasure hunter sets off on an adventure to find the spare band, why not try a few different instruments and see which sound you like jamming out to the best?
Tip
If your laminate floor resembles a Jackson Pollock, consider keeping some Plenty Flexisheets – Product of the Year 2024 winner* – to hand. They’re tubeless, and while this isn’t much help for crafting instruments, they’re incredibly useful to clean up the aftermath. And with more perforations on the roll, you choose what you use!
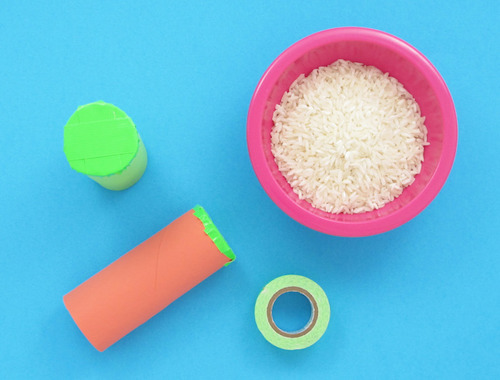
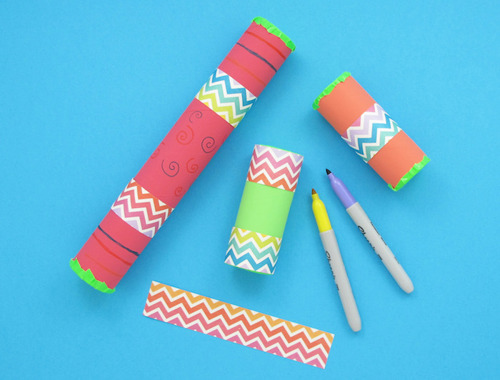
How to make a kitchen roll shaker
When it comes to musical instruments kids can make, the classic shaker is a must. After all, no band is complete without a rhythm section. Next up in our ‘How to make musical instruments with recycled materials’ tutorial is—drum roll please—a simple kitchen roll shaker! Just be sure to follow these steps closely and keep the shaker contained, because if you thought shaking it was a work out, you should try picking up thousands of grains of rice out of the carpet. But hey, the carpet needed a clean anyways, and the kids have gained a core memory they’re unlikely to forgot for a long time.
You can make this instrument out of an empty Plenty kitchen roll tube, some duct tape, dried rice or beans. Get creative with pens and markers to decorate and personalise your homemade musical instruments. Let’s get started!
Tip
Just as you're cutting down on waste by repurposing it for this craft, we're taking steps on our own sustainability journey. Our kitchen roll is as strong as ever, and we're committed to a goal of 100% recyclable packaging by 2030. It’s no compromise on quality, but less waste.
Takes 1 hour
What you’ll need for your homemade instrument:
- Plenty kitchen roll tubes
- Toilet roll tubes
- Paint
- Paint brush
- Coloured duct tape
- Scissors
- Dried rice or beans
- Wrapping paper
- Glue
- Coloured pens or pencils
How to make the musical instrument:
-

-
-
Tip
Tip: Getting more for less is a great feeling. So is putting a smile on your loved one’s face. For more great ideas on how to do both of these things, check out some of our other ingenious kitchen roll crafts, like these impressive-yet-easy paper crafts, or these recycled cardboard animals.
That’s it: you’ve just learned how to make musical instruments. You also know how to create a long-lasting memory with your budding musician, while reducing waste – what's not to love? Now it's time to have a blast bringing your homemade instruments to life. Who knows, one day, we might see you and your kitchen roll shaker in the charts!
*Winner General Household Category. Survey of 8,000 people in UK & ROI
Did you find this article helpful?Thanks for your feedback!
or
Do you have a question on this topic? Contact us
Related articles
Why is my cat being sick? Symptoms, causes, and solutions
“Why is my cat sick?” Learn about the signs of illness in cats, the reasons why your feline friend might be sick, and how to treat a sick cat at home.

How to save money at home: simple saving tips and budgeting tips
Looking for simple ways to save money at home? Follow our budgeting tips and saving ideas to help you save money and provide more for your loved ones!

How to speed up composting: 10 hacks to accelerate your compost
Are you looking for ways to speed up your compost? Discover how to accelerate compost with our 10 hacks. Accelerating your compost has never been easier!

What to do with leftover food: creative ways to use food leftovers
From leftover chicken ideas, to what to do with leftover rice, find out how to get the most from your food leftovers.

Shortage of water: what is water stress and what can we do about it?
What is water stress, and what can we do to reduce its impact? Learn about water stress, its definition, causes, effects, and how to help water scarcity.

How to save money on food shopping with eco-friendly shopping tips
Want to know how to save money on groceries and how to shop sustainably at the same time? Look no further than our top tips.

