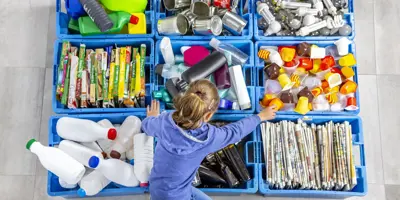
When you think about making a castle, cardboard may not be the first building material you think of. But whether you need a rainy-day activity, or simply want an addition to imaginative play for children, a cardboard castle is the perfect choice.
Let your imagination run wild and join the kids with this cardboard castle idea, which can later be filled with princesses, knights, or even cardboard tube animals – who said that animals can’t live in castles?
Learning how to make a cardboard castle is easy, and largely remains the same whatever the shape or size. It’s the decoration you can really fly and get creative with, so have a think about what kind of castle you want to build before you get started. Once you’ve chosen a design and planned your castle, you’ll need to follow these 6 simple steps to create your cardboard castle:
- Make the cone-shaped tower roofs.
- Cut your cardboard towers to size.
- Attach the roofs to the towers.
- Draw (or stick!) on windows and doors.
- Wrap or colour in a rectangular cardboard box.
- Attach your towers to your box.
Read on for more details on each step, with visuals to guide you through the process of how to make a castle out of cardboard.
Tip
When it comes to using this guide to make a DIY castle, always do your DIY safely. With this in mind, make sure that adults do any parts that require the use of scissors, but feel free to let the kids get creative with the decorations.
How to make a castle out of cardboard: what you need
One of the great things about this DIY castle is that it uses leftover packaging, so you’re not only teaching the children how to make a castle from cardboard boxes, but also how to recycle in creative ways!
You will need to get together the five following things for your cardboard castle DIY:
- One or more cardboard boxes
- Empty cardboard rolls from kitchen towels and toilet paper
- Coloured paper
- Glue
- Paint, pens, stickers – whatever you’d like to use to decorate your DIY castle.
Tip
Whenever you finish your Plenty The Extra Big One, Plenty The Original One, or Plenty Flexisheet, put the tubes in a special ‘craft’ box for projects like these. Simply save them for a rainy day and upcycle them as part of your cardboard castle DIY project, to make cardboard flowerpots and so much more.
How to make a cardboard castle: step-by-step instructions
Once you have gathered together everything that you need for your DIY castle, it’s time to get creative. Simply follow this 7-step guide for how to make a cardboard castle:
-

-

-

-

-

-

-

See, how easy was that? These seven steps are all you need to have a load of fun at home with your own cardboard castle. DIY never looked so good!
What kind of castle made out of cardboard will you create?
Now you have seven simple steps to follow for how to create a cardboard castle. Once you’ve got the basic cardboard castle DIY mastered, it’s time to get creative and change up the design. Why don’t you try one of these themes for your cardboard castle:
- Princess castle
- Knight castle
- Dragon castle
- Pirate castle
- Space castle
- Seabed castle
- Fairy/elf castle
- Animal castle
Tip
It’s not just cardboard castles that are great for rainy day play. Why not try some other craft with your children to go with your castle theme, creating a crown for your little prince or princess or even a telescope and eye-patch for your swashbuckling pirate.
We hope you found our guide on how to make a castle out of cardboard fun and easy-to-follow. With that, you have our guide for how to make a cardboard castle and the only thing limiting you now is your imagination. In six simple steps you can create any number of castle designs. All that’s left is to decide what type of castle made out of cardboard you’ll create first!
Oh, and don’t forget to always recycle your cardboard once you’re done with it! Break it down first, and then leave it in the paper bin. Otherwise, you can also compost it for mulch and gardening.
If you enjoyed reading this article, you might want to take a look at our family life hub. It’s full of great craft ideas, including making a handmade bunting and easy paper crafts to keep your children occupied, without the mess.
Related articles
Clean and green! 10 tips for eco-friendly cleaning
From baking soda and lemon cleaning methods to a surprising kitchen cupboard treatment for mould, read our sustainable cleaning products ideas for your home!
Reducing waste at home: The easy way
Find out how to save energy at home and reduce food waste with our top tips. Read on for handy pointers for making your household more eco-friendly.
6 tips on how to save water at home
Learn how to save water at home. Find five easy ways to conserve water, so you can bring down your waste and make some clever savings in the process, here.

What does biodegradable mean and what is non-biodegradable?
Biodegradable and non-biodegradable? What do they mean?! Don’t fret, discover the definitions and biodegradable materials to become an eco-friendly pro!
How to lead a sustainable lifestyle in 5 key ways
Learn how to live more sustainably with our tips on diet, methods of transport, energy consumption and product choices. Find sustainable living examples here.
How is plastic packaging recycled, and what does it get turned into?
How can plastic be recycled? Discover the steps that plastic goes through in the recycling process, and how much plastic is actually recycled, here.
